How to Turn Your Photo Into a 3D Printed Figurine Using AI (No Tech Skills Needed)
Mar 18, 2026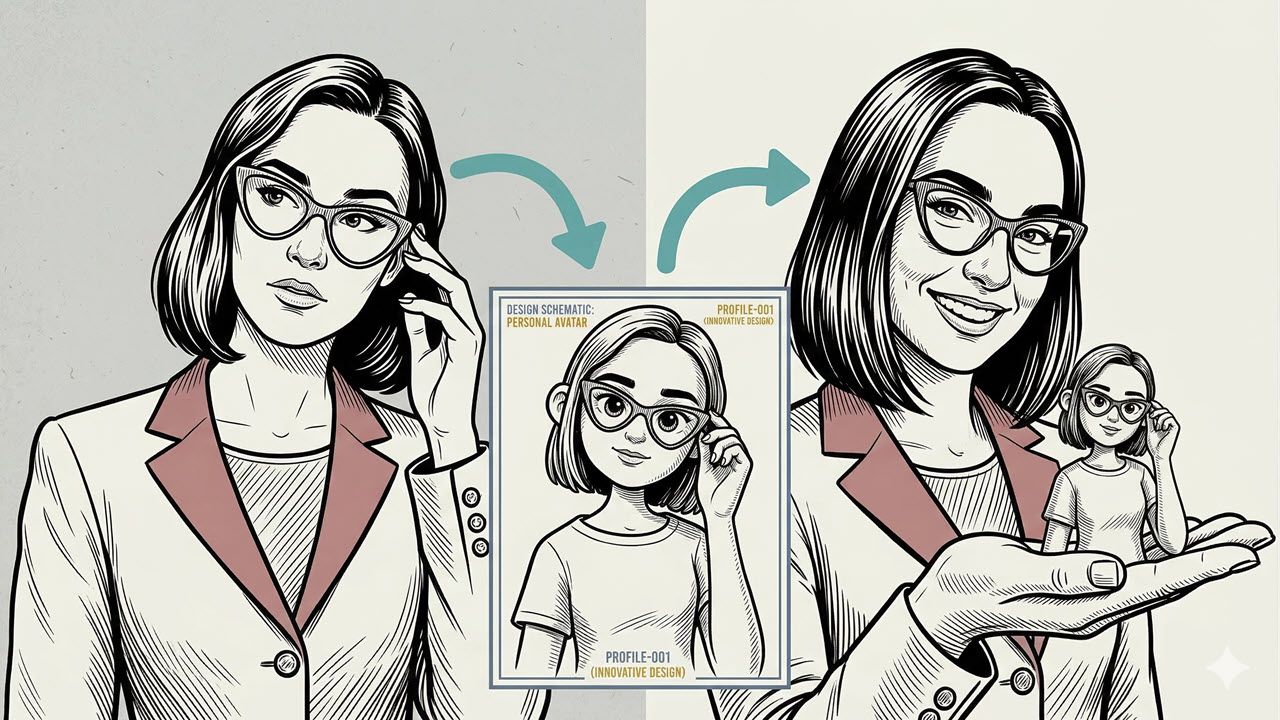
Imagine holding a tiny, physical version of yourself or your pet in your hand. It sounds futuristic, right? Well, it's not. You can do this today, at home, with free or low-cost AI tools — and no technical skills whatsoever.
This guide walks you through every single step. By the end, you'll know exactly how to go from a simple photo to a real, printed figurine delivered straight to your door.
Why AI-Powered 3D Printing Is a Big Deal Right Now
It's Not Just a Toy Anymore
Most people think of AI as something that makes images or writes text. But AI has quietly moved into the physical world. You can now use it to create actual objects you can touch, display, and gift.
This isn't just a fun trick. It's a real workflow for small business owners, gift givers, and home decor fans. Think custom merchandise, personalized gifts, or unique desk decorations — all made without hiring a designer.
No Blender. No Maya. No Problem.
Old-school 3D modeling required years of training. Tools like Blender and Maya have steep learning curves that scare most people away. This new AI workflow skips all of that.
You don't need to understand UV mapping, polygon counts, or geometry. The AI handles everything. The whole process takes just a few minutes from start to finish.
The Two Tools You Need to Get Started
Tool One: Flux Labs AI for Image Styling
The first tool is Flux Labs AI. This is an AI image generator that's great at keeping character details consistent. You'll use it to turn your photo into a stylized, toy-like version of yourself or your pet.
Why do this step first? Because the 3D modeling AI works much better when your subject already looks like a cartoon figure or toy. It gives the AI cleaner data to work with.
Tool Two: Tripo AI for 3D Model Generation
The second tool is Tripo AI. This platform converts your stylized image into a full 3D model with real depth and volume. It's one of the fastest and most reliable image-to-3D tools available right now.
Tripo AI also connects directly to a printing and fulfillment service. That means you can order a physical version of your model right from the same platform. It's a true end-to-end workflow.
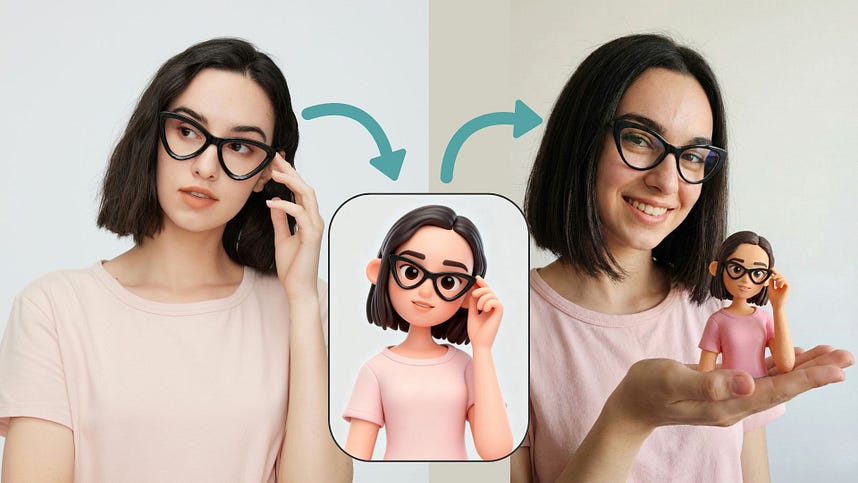
Step One: Turn Your Photo Into a Stylized 3D Image
How to Use Flux Labs AI
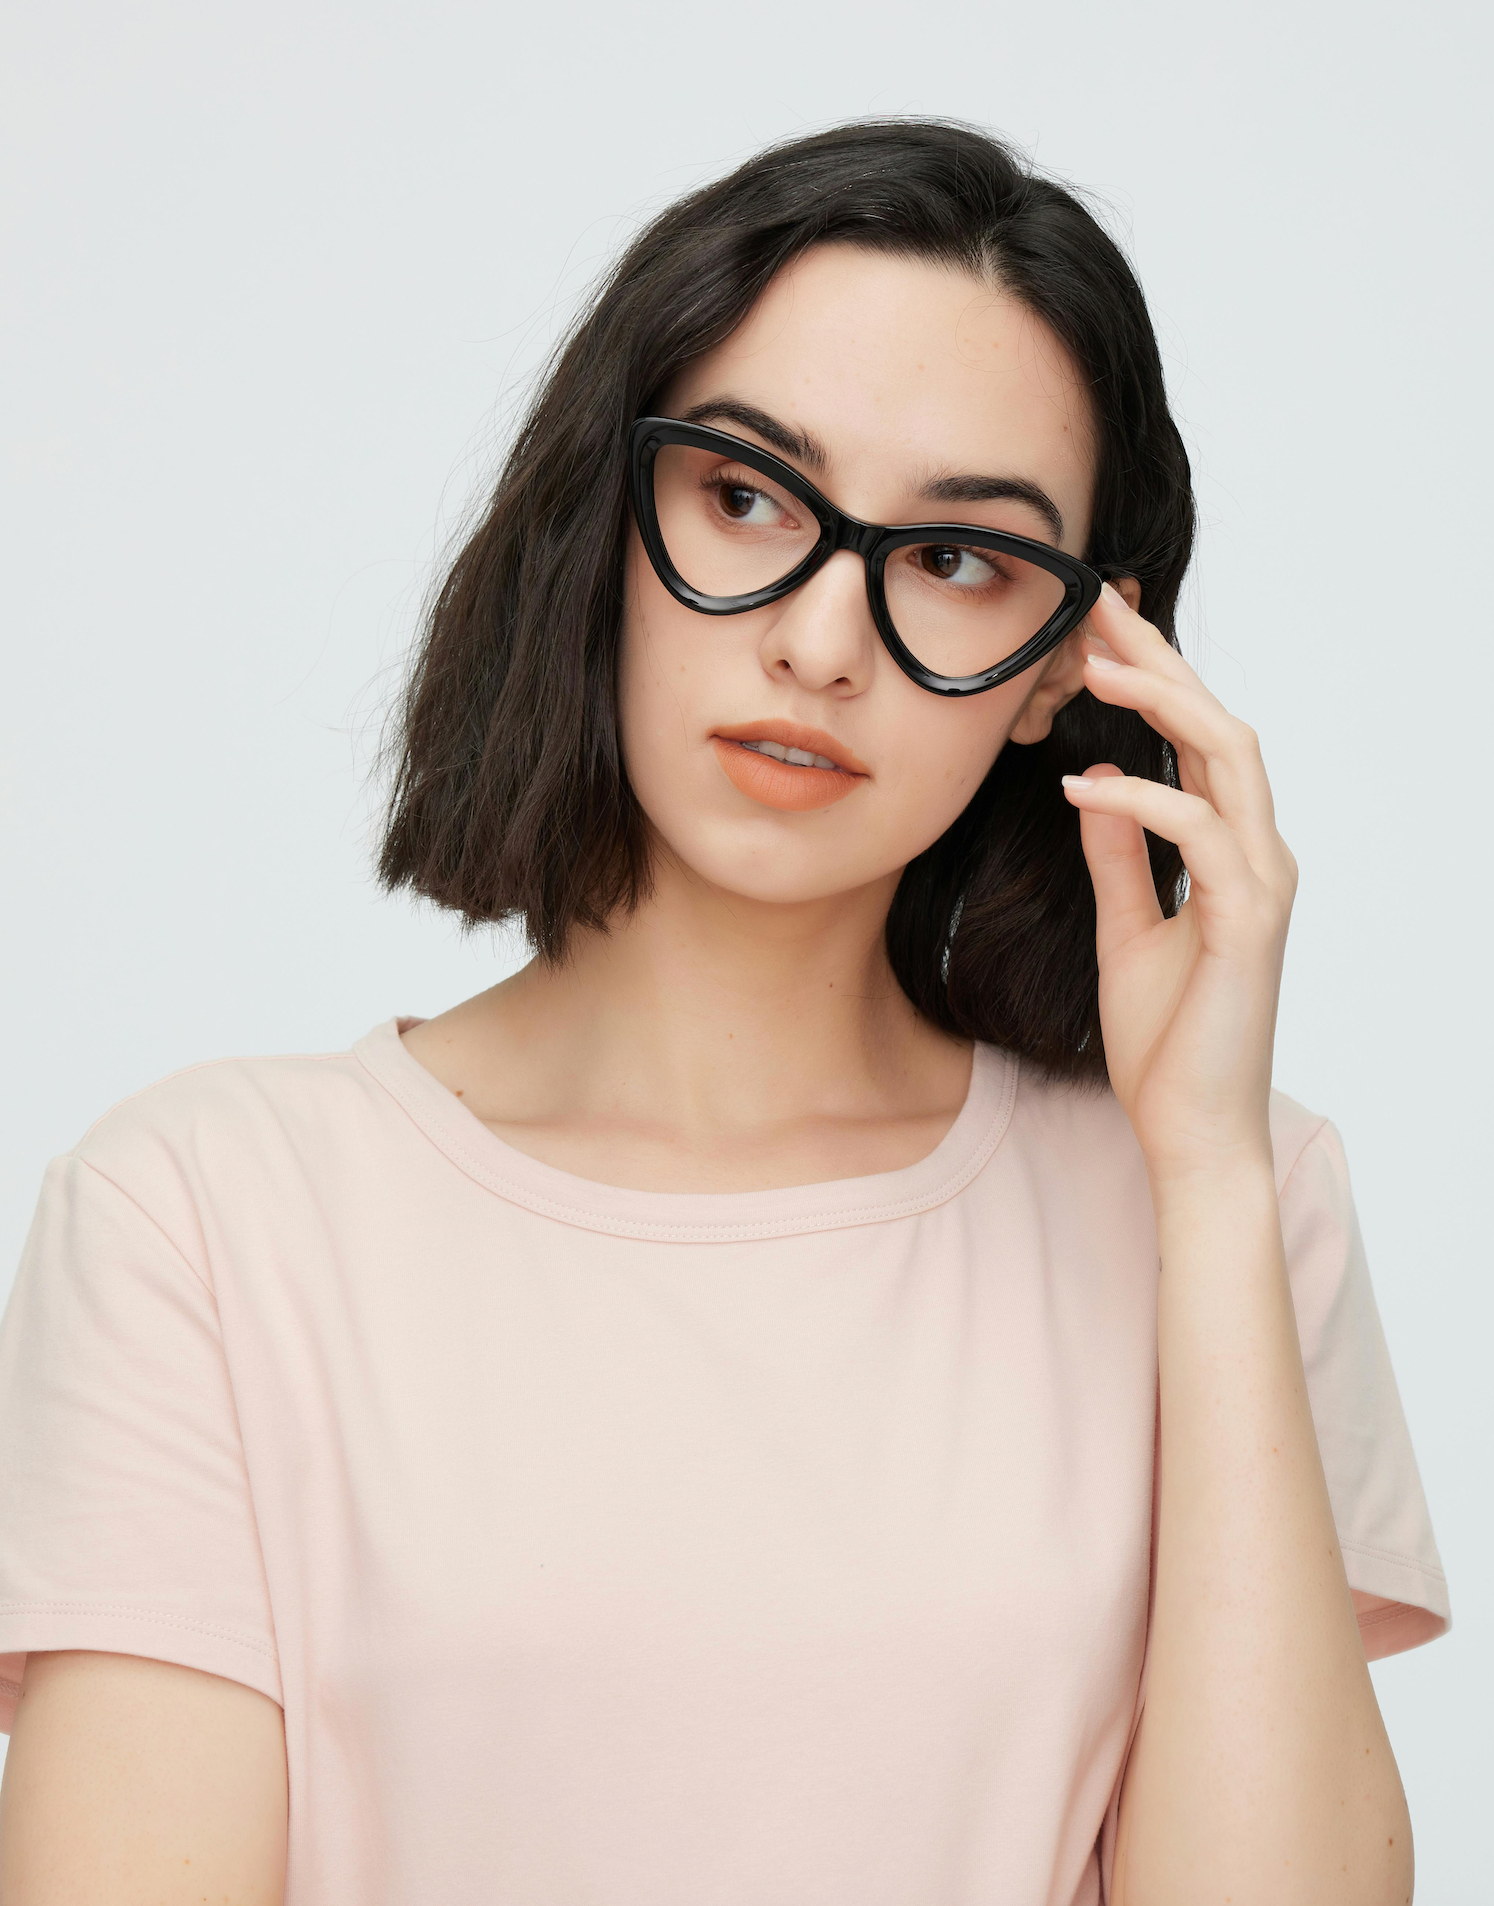
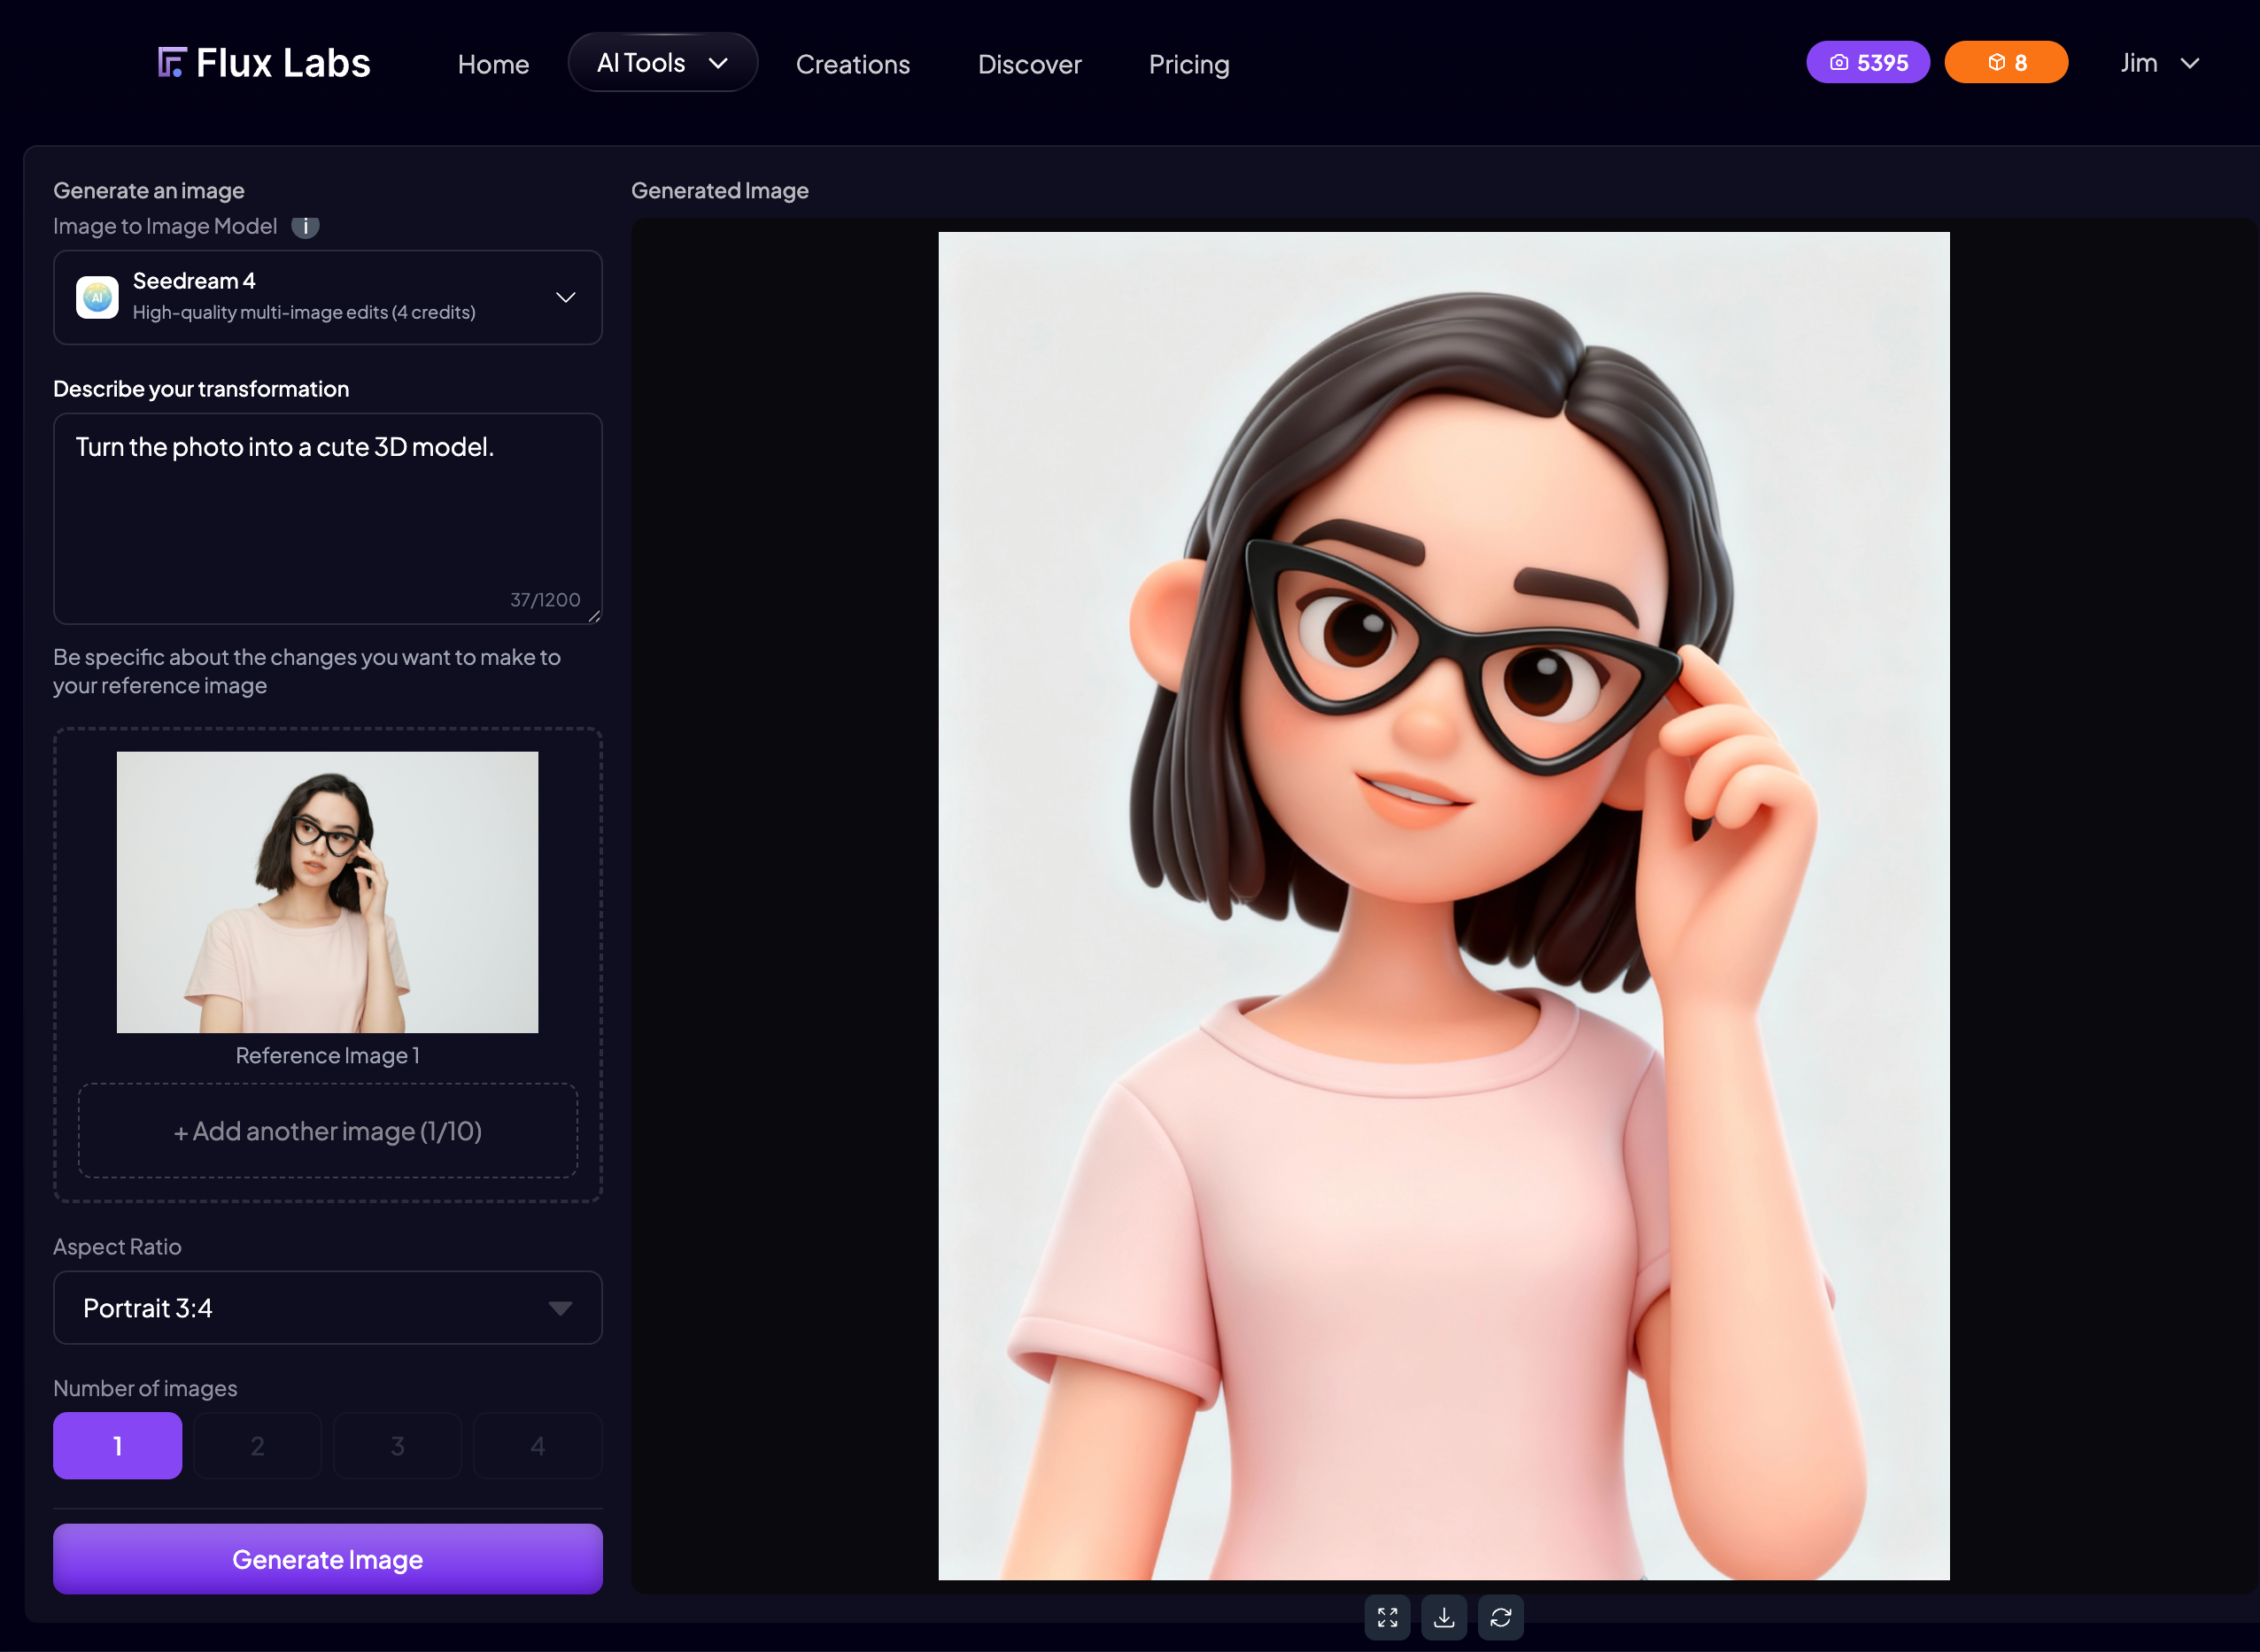
Head to Flux Labs AI and open the image-to-image tool. Upload your photo — a clear, well-lit shot works best. Then use this exact prompt to get great results:
- Prompt: "Turn the photo into a cute 3D model. Clean background."
The phrase "clean background" is important. Always include it. A busy or cluttered background can confuse the 3D AI in the next step. It might accidentally try to model a tree or a wall as part of your subject's body.
Tips for the Best Output
Here are a few quick tips to get the best stylized image:
- Use a photo where the subject is centered and clearly visible.
- Avoid photos with harsh shadows or low lighting.
- Check the output before downloading. Make sure the background is simple and clean.
- If the result looks too busy, regenerate it until you get a clean version.
Once you're happy with the result, download the image to your computer. That's your input for the next step.
Step Two: Convert Your Image Into a Real 3D Model
Getting Started With Tripo AI
Go to the Tripo AI website and create a free account. Once you're logged in, find the Generate Model tab inside Tripo Studio. Upload the stylized image you just created.
You'll see several settings before you hit generate. For most people, the default settings work perfectly fine. But if you want extra detail, select Ultra Mode before generating. It produces sharper textures and cleaner geometry right from the start.
Refining and Retexturing Your Model
After your model generates, you have two powerful options to improve it:
- Refine: Click the Refine button to run a second AI pass. This sharpens the mesh and improves texture quality significantly. It's worth the extra few minutes if you plan to print it.
- Retexture: Use the prompt box to change colors or materials. For example, you can type "change the shirt to blue" or "add a metallic texture." The shape stays the same, but the look changes.
One of the best things about Tripo AI is how it handles the back of the model. Older tools used to produce weird, melted-looking geometry on the sides and back. Tripo AI fills in those details impressively well.
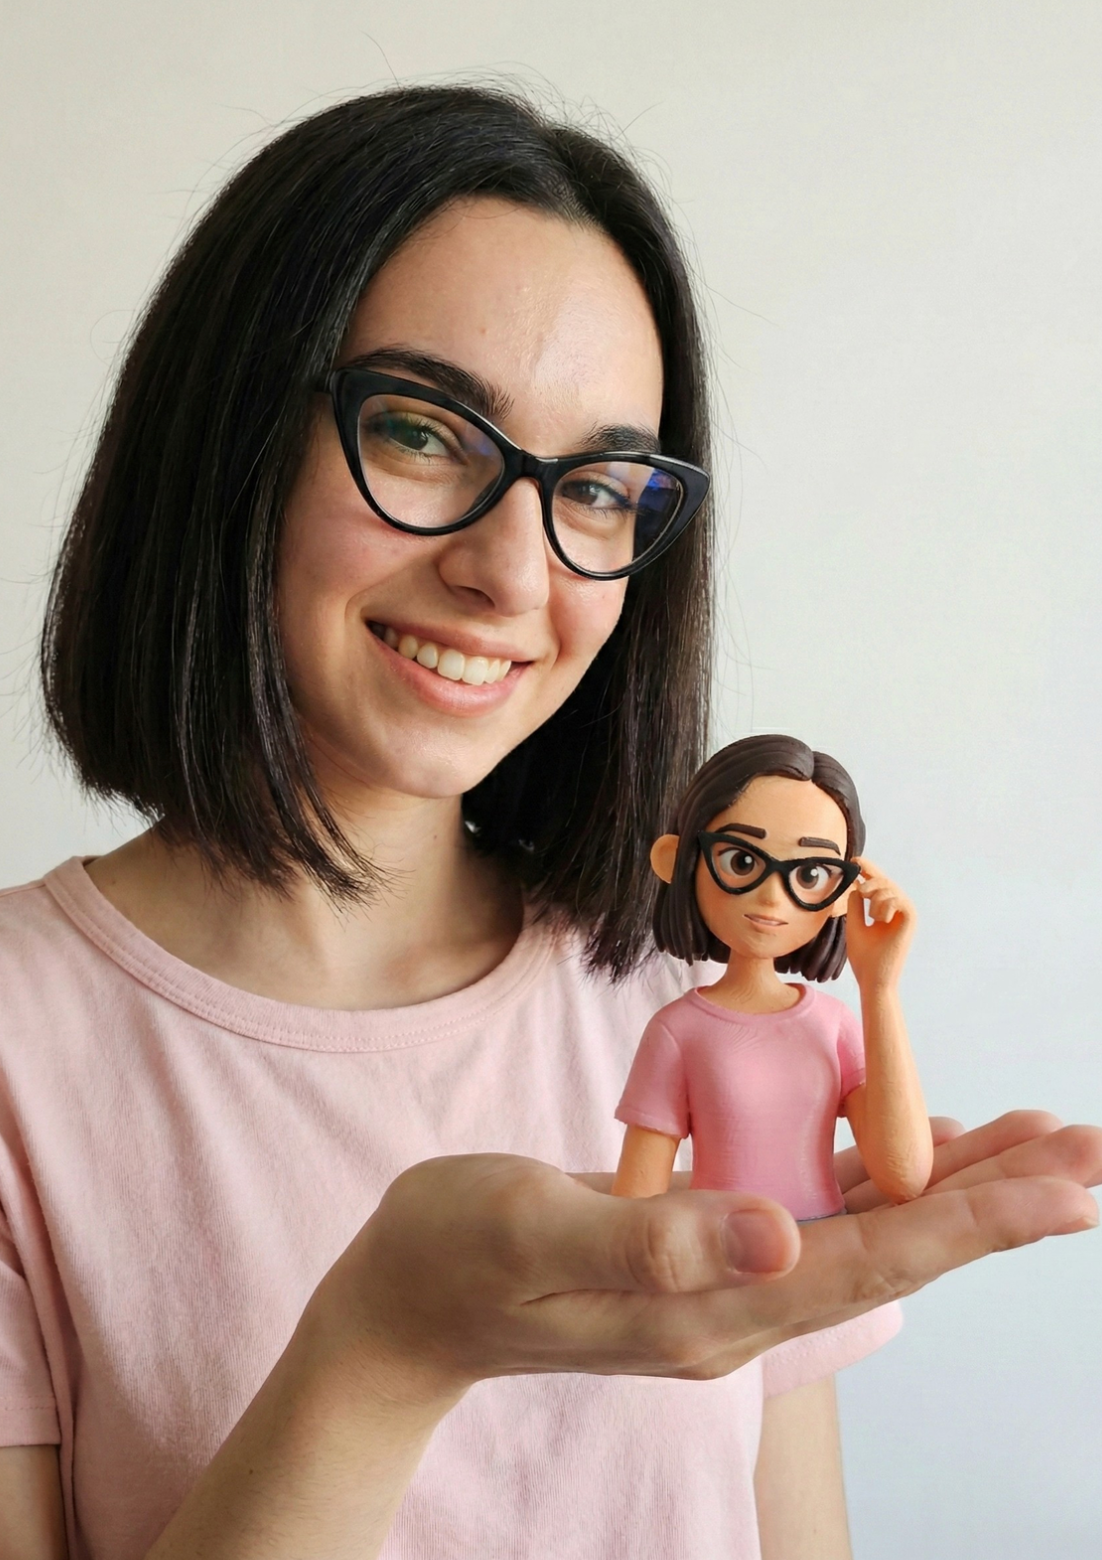
Step Three: Order Your Physical 3D Printed Figurine
How to Place Your Order
Inside the Tripo AI dashboard, look for the gift button below the model viewer. Clicking it opens the "Get My DIY Gift" screen. From here, you choose your product type and size.
Here's a quick breakdown of the current options and prices:
- Standalone Model: Currently free (down from $9.99). A classic display figurine available in sizes from 3cm to 10cm. Great for desks and shelves.
- Fridge Magnet: $7.99. Turns your model into a functional magnet. Available in 3cm, 5cm, and 6cm sizes.
- Keycap: $29.99. Mounts your model onto a mechanical keyboard keycap. A premium, one-of-a-kind accessory.
What Happens After You Order
The fulfillment process is simple and transparent. Once you purchase, paste the link to your model design. The team reviews it within one business day to make sure it's printable.
After that, here's what to expect:
- Production: 7 to 14 working days for manufacturing and finishing.
- Shipping: Tracked delivery with updates sent by text and email.
- Support: Contact [email protected] for any issues or refund requests.
Who Should Try This Workflow?
More Than Just a Fun Project
This workflow has real practical value across several groups of people. Here's who can benefit most:
- Entrepreneurs: Sell custom 3D printed merchandise without learning complex software. It's basically a business model in a box.
- Gift givers: Create a one-of-a-kind personalized gift for a birthday, anniversary, or holiday.
- Game developers and 3D illustrators: Prototype character assets quickly without spending hours sculpting from scratch.
- Web developers: Generate 3D assets for apps and interactive web experiences.
- Pet owners and families: Immortalize a beloved pet or a funny family photo as a physical keepsake.
The quality Tripo AI produces is genuinely good enough for professional work. The meshes are clean, the textures are sharp, and the results are consistent. This isn't just a novelty — it's a legitimate production tool.
Your Quick-Start Recap Before You Dive In
The Full Workflow at a Glance
Here's the complete process summarized in five easy steps:
- Take or find a clear photo of your subject.
- Upload it to Flux Labs AI and use the prompt "Turn the photo into a cute 3D model. Clean background."
- Download the stylized output and upload it to Tripo AI.
- Generate your 3D model. Use Ultra Mode or run the Refine pass for best quality.
- Click the gift button, choose your product, and place your order.
That's genuinely all there is to it. No design degree needed. No expensive software. Just a photo, two free tools, and a few minutes of your time.
Have you tried turning a photo into a 3D model before? Or are you thinking about using this for a gift or a business idea? Drop your thoughts in the comments below — I'd love to hear what you're planning to create. And if you found this guide helpful, share it with a friend who'd get a kick out of printing their pet as a desk figurine.
